Unit Testing is my friend
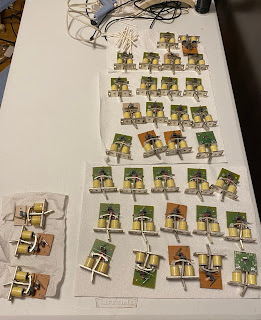
I've soldered all those wires and female headers onto my SAM units. For once in my life, I'm going to do things the right way around and test all of them before installing them into the organ.
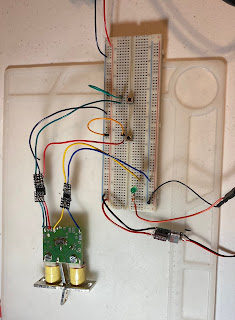
I breadboarded a simple testing widget with male connectors matching the females on the SAM unites. The power and ground wires coming from off screen above are attached to the ASTRON SS-18 I got to power all these magnets. At the bottom is a UBEC 12v-5v converter for the LED. The circuit for the reed switch is entirely separate from the wiring for the magnets, so it can connect directly to the arduino running at a lower voltage than the magnets. I'm converting here to use just one power source, and avoid having to connect and program a microcontroller for a very simple test.
As you see, there are two little push buttons. Push the left one and the stop flips on (down) and the green LED lights. Push the right one and it flips off (up) and the light goes out. Repeat a couple of times to be sure it is all working correctly. Unplug the SAM, and plug in the next one. Repeat until all are tested and any issues corrected.

Later on, when I'm working on the arduino that will control these things, and it isn't going right, I will not be confused about where the problem is. Yay.
Next...
I breadboarded a simple testing widget with male connectors matching the females on the SAM unites. The power and ground wires coming from off screen above are attached to the ASTRON SS-18 I got to power all these magnets. At the bottom is a UBEC 12v-5v converter for the LED. The circuit for the reed switch is entirely separate from the wiring for the magnets, so it can connect directly to the arduino running at a lower voltage than the magnets. I'm converting here to use just one power source, and avoid having to connect and program a microcontroller for a very simple test.
As you see, there are two little push buttons. Push the left one and the stop flips on (down) and the green LED lights. Push the right one and it flips off (up) and the light goes out. Repeat a couple of times to be sure it is all working correctly. Unplug the SAM, and plug in the next one. Repeat until all are tested and any issues corrected.


Later on, when I'm working on the arduino that will control these things, and it isn't going right, I will not be confused about where the problem is. Yay.
Next...

Comments
Post a Comment