A Swell Day
 Everything proceeded according to plan in the last week. I built the second sensor array, incorporating everything I'd learned making the first one, and installed it into the Great manual. I took the first one out and corrected the misaligned sensors (I only had to remove and replace 4 total. I was able to scootch the boards of 8 sensors back and forth to get most of the others lined up correctly. Then I installed that array into the Swell and plopped it into the organ for testing. A couple of rounds of correcting wires and nudging magnets and it is good to play!
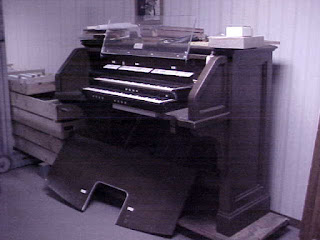
 You can on the right side of the left photo, the Mac Mini I acquired to dedicate to this project. It is a new model quad core i3 with 16GB memory and 128GB SSD. I know I'm going to need a ton more disk space but I'm figuring on adding an external drive.
 I borrowed a monitor I use for my work laptop to get going - I'm still pondering what I will want to do for screens on a permanent basis but this lets me play test and get a feel for what might be good with the shape of the console.
You can also see I've stripped everything strippable. I will clean, MIDIfy, and re-install pieces one at a time, but I can play my organ now while I'm doing that!
The next most important thing for playing in comfort is the music stand - as you can see I'm sort of making do here. This step drags in some pre-requisites. The music rack is a heavy piece of lucite on hinges bolted to the nameboard. The nameboard used to be bolted to the combination action box, which is permanently removed. I saved the nice solid iron angle brackets and will screw the nameboard to the sides of the organ instead. The wood is thick enough I can screw into it solidly without going all the way through. If that looks like it might be problematic, I can work something out with the rail going across the back.
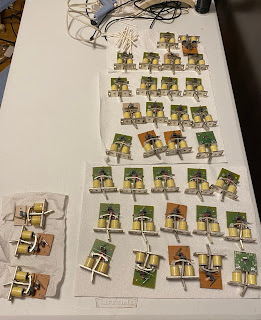
Before I semi-permanently mount the nameboard, I want to install the SAM units into it. I'm not ready to make them working yet - that requires a new power supply and wiring harness. The current electronics are low power enough that it all runs off the Mac Mini USB but that won't do for the SAMs. The console was electro-mechanical so there were no SAMs on the stop tabs. I acquired a set of gently-used SAMS from a gentleman on the organ forum. They have solder pads but not sockets or pins. The plan for the next few weeks is:
- Solder wires and a 4-wire female socket to each of the SAMS.
- Breadboard a testing unit, incorporating the larger power supply and relays to deal with the voltage.
- Test each of the SAMS to make sure they work - fix or replace any problems.
- Template the SAM placement into the nameboard, drill pilot holes and install.\
- Screw the nameboard onto the organ.
- Cut, sand, stain and wax the small oak board I bought to be the bottom of the music rack (this part was missing) and attach it to the rack. Bolt the music rack into place on the nameboard.
But in between all of that, I shall practice whenever I need a break :-D
Next ...

Comments
Post a Comment