Lots of notes and photos
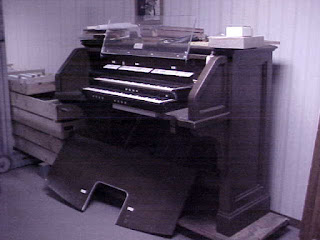
I spent Thanksgiving examining and removing bits from my new toy. It was hugely fun, and I've mostly got it sorted out now. I removed the combination action box - a pity as it is a really neat bit of mechanical engineering, but that job will be done by the computer and it is massively in the way. I also took out the remnants of the power supply, and all the wires leading to nowhere (formerly the pipe chamber).
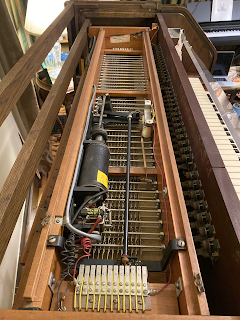


The wires leading out of the manual (and pedal) mechanisms come in to the bottom of this panel. From here wires are soldered leading out and would have gone to the pipe chamber but are now all just cut. I clipped all the wires coming from the top and will attach leads to my electronics in their place. I'm slightly regretting not unbundling and using the existing wires.
The mystery of the two white wires coming from the pins towards the top of each pedal mechanism is solved - those are for two ranks of pipes that were installed in a later addition - Tuba 8' and Open Diapason 8'

Here you can see the white wires end up on this block soldered to the bottom set of contacts. The stop action solenoid there pushes the top set of contacts to meet the bottom set, and the signal from the pedal is sent off to the labelled pipes.


Things I have learned...
the pedals and manuals have the same sliding bar and vertical whisker mechanism. It was easier to figure out from the manuals once I saw them.
The sliding bars with the vertical wires you can barely see are the stop controls. Each vertical whisker has a wire soldered to its bottom that is routed along, very neatly bundled together with its friends, and soldered to a big connection panel.

There is a thick wire going across for each key, bent into a crankshaft shape. You can just see the ends of the bars for the lower manual (the Great) here. The steel bar coming across above them is powered and the crankshaft is conductive.
Pressing a key pushes on a the crank end, making it rotate. This swings a bar across towards all the whisker contacts. If a stop is engaged, the electromagnet at the end pushes the sliding bar so its whisker is in range and makes contact, otherwise nothing happens.
On the upper manual (the Swell) there are three sliding bars, but only 2 have solenoids - the center one is just always engaged. The two solenoids are labelled 'swell - swell 4' and swell - swell 16' which corresponds to two of the stop labels. So, these are couplers rather than stops - when the 4' is engaged, whenever you press a key on the swell you get two notes - the one you pressed and also one an octave higher - on all stops that are open on the swell. The 16' adds a note an octave lower. (8' is called unison pitch , it plays the note as written in the score and is essentially default)
This is also a function I will leave to the computer, but the mechanism would be hard to remove, it is easier to keep it as-is and just pick up the signal from the wiring coming out. In the future I can consider taking it out and installing reed switches or Hall sensors, but I'm happy going the minimalist route to start with.

The wires leading out of the manual (and pedal) mechanisms come in to the bottom of this panel. From here wires are soldered leading out and would have gone to the pipe chamber but are now all just cut. I clipped all the wires coming from the top and will attach leads to my electronics in their place. I'm slightly regretting not unbundling and using the existing wires.
The mystery of the two white wires coming from the pins towards the top of each pedal mechanism is solved - those are for two ranks of pipes that were installed in a later addition - Tuba 8' and Open Diapason 8'

Here you can see the white wires end up on this block soldered to the bottom set of contacts. The stop action solenoid there pushes the top set of contacts to meet the bottom set, and the signal from the pedal is sent off to the labelled pipes.

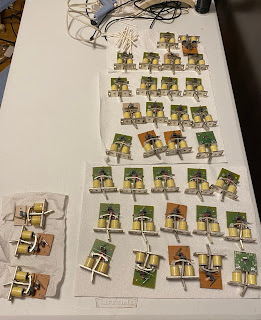
This thing is a Sforzando. It is attached to an expression shoe (calling it a pedal would be confusing). Pressing on the shoe rotates the big wood cylinder. There is a metal plate across part of it which is triangular shaped, as it rotates the metal part comes in contact with more and more of the wires. These activate stops - the idea is you can bring on full organ incrementally by pressing on the shoe. There is a similar, smaller, mechanism with maybe 10 or 12 wires for each of the other two shoes which are used to control shades. The pipes that are 'under expression' sit in a bit box with a vertical venetian blind-like contraption which can muffle the sound or let it out. The wires go to a section of the wiring panel labelled 'shades' and no wires come out. This matches up with the hand-written sticker on the music rest that says 'This organ has no shades so those two pedals are not functional'.
Virtual organ software can emulate shades. I could replace this mechanism with a potentiometer and read it off to say what the expression value should be, which is how modern consoles do it, or I can keep it as-is and just sum the pins to get a value. I'm planning on using the mechanism if it works.
Next is lots and lots of playing around with a multimeter to test connectivity through each key before I start soldering anything and then wondering why it's not working.

Comments
Post a Comment